

Personal Note:
I've been in technical and fictional writing since long and sharing my thoughts, and I've experimented with various platforms like Medium,Hashnode,dev.to,linkedin,etc. While they're great,need to get more control and flexibility over blog, either we can directly use wordpress or use existing solutions.
All things ended-up in failed write-up Hosting Blog via manually installing Wordpress on AWS Lightsail.
Introduction
For Solution Architects, IT professionals, Cloud Enthusiasts, and Software Engineering Researchers, understanding and utilizing AWS Solutions and technologies is crucial.
In this post, we go deep into the simplicity and efficiency of using AWS Lightsail for hosting websites and web applications.
AWS Lightsail, a virtual machine hosted in the AWS cloud, offers a minimalistic and cost-effective approach to cloud hosting.
Ease of Use: AWS Lightsail provides a virtual private server (VPS) offering that allows you to host applications in the cloud easily. It's designed for quick starts, allowing you to begin small and scale as your needs grow.
Cost-Effectiveness: There's no need for a large initial capital investment. AWS Lightsail offers inexpensive monthly plans, making it an affordable choice for hosting needs.
Managed Resources: AWS manages all the underlying cloud resources, eliminating the need for users to learn complex hardware configurations and management.
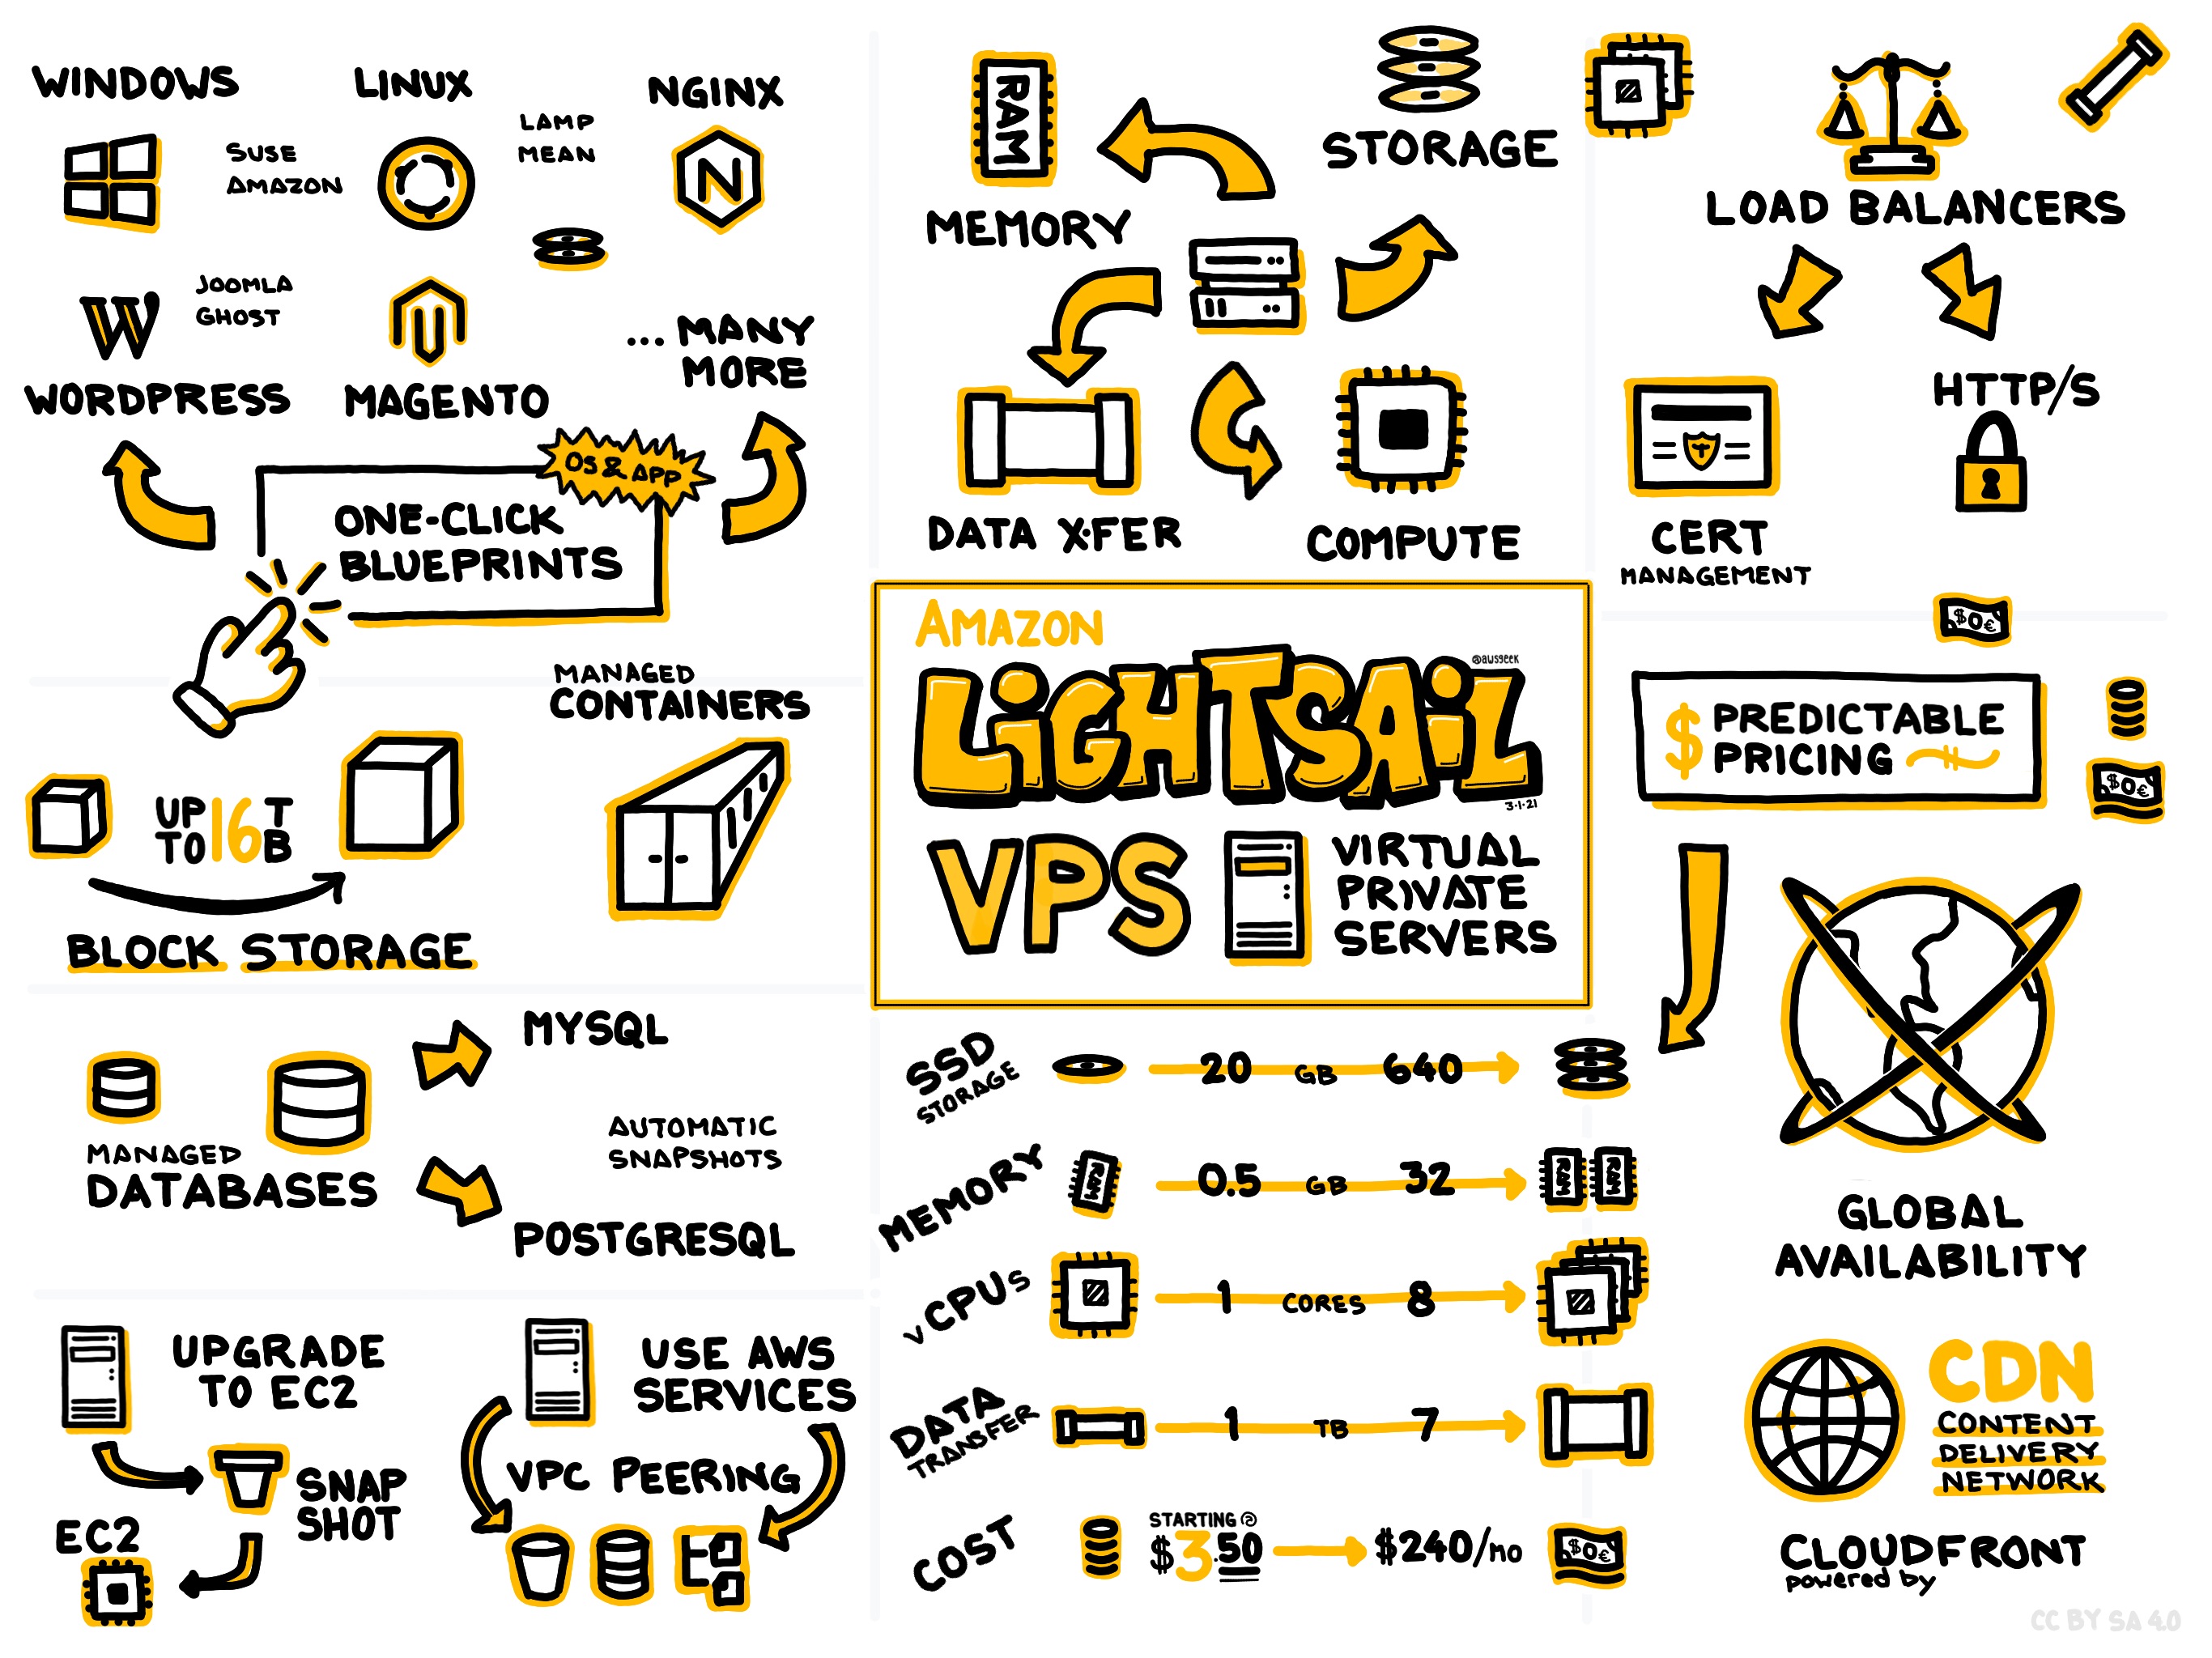
Amazon-Lightsail.jpg by AWS Geeks
**
Getting Started with AWS Lightsail**
The journey begins with setting up your user credentials on AWS. Here's a step-by-step guide to getting your AWS Lightsail instance up and running:
Step 1: Set Up User Credentials
Navigate to the top-right corner of any AWS page and click on your username.
Go to 'Security Credentials' and click 'View User'.
Enter your password when prompted to access your user credentials page.
Step 2: Creating an Amazon Lightsail Instance
Ensure you're in the
us-east-1region.Log in to the AWS Management Console using your credentials.
In the AWS Management Console, create a new Amazon Lightsail instance.
Generate an SSH Key and name it
LightsailDemo.Download the SSH key for future use.
Step 3: Configuring Your Instance
Select the 'OS Only' blueprint option.
Choose 'Amazon Linux' for your operating system.
Opt for the '512 MB' instance plan and give your instance a unique name.
Step 4: Connecting to Lightsail Instance
Connect to the instance using SSH (Secure Shell).
For Windows users, review the Lightsail documentation on setting up PuTTY for SSH connections and download PuTTY if necessary.
Others(Non-Window non-putty method) can either use directly web SSH client or a full SSH client on your local workstation for connection.
Step 5: Installing WordPress
- Once connected, proceed to install WordPress on your Lightsail instance.
https://github.com/yashvikothari/Install-Wordpress-on-AWSLightsail-for-blogs
OR
In first-place we can leverage Lightsail APP+OS and get wordpress-pre installed by Bitnami.
References:
Amazon Lightsail docs:
https://aws.amazon.com/getting-started/hands-on/launch-a-wordpress-website/